
Changing the Picture Size
 you should format your picture in a photo-editing program. But, you can use Word’s built-in photo-editing tools for simple changes.
To resize a photo, you can click it and use the corner boxes to resize it. Or, if you need more precision, you can use the Format Picture dialog box:
1. Right-click the picture and select Format Picture
2. In the Format Picture dialog box, click the Size tab
3. You can use the Height and Width boxes at the top to enter a size in inches
4. You can also use the Height and Width boxes in the scale section to specify the size as a percentage
5. Deselect Lock aspect ratio if you don’t want to retain the current width to height ratio
6. Click OK
Changing Picture Layout Options
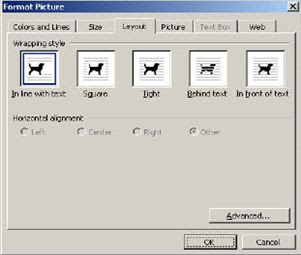 Word provides you with a variety of options for changing the layout of your picture. For example, you can have the text wrap around the picture, or you can insert the picture inline with the document text.
To change the layout options, follow these steps:
1. Right-click the picture
2. Select Format Picture
3. Open the Layout tab
4. Select how you would like your picture to appear
5. For advanced options, such as the amount of space around the picture, click Advanced

